
Quick Links
- Definition: What is Snapshot Lifecycle Management?
- How to Use Snapshot Lifecycle Management?
- Creating an SLM Policy
- Conclusion
Definition
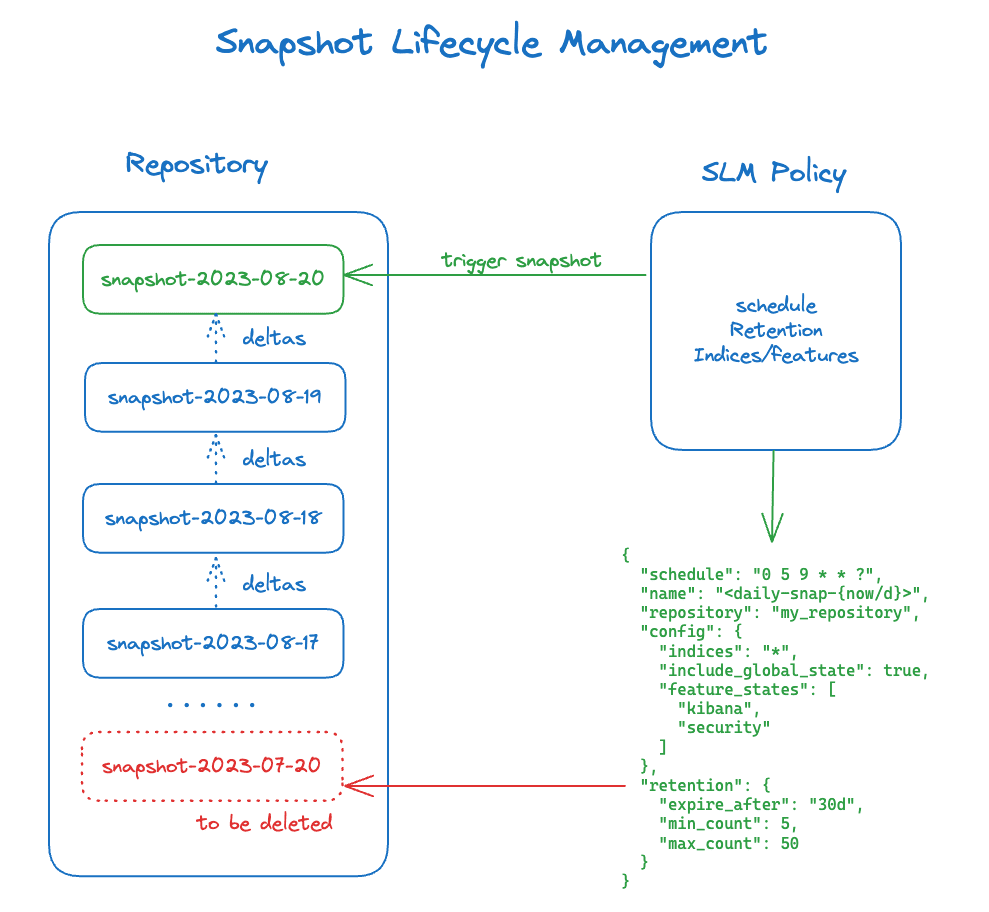
Just like with Index Lifecycle Management, Elasticsearch provides the Snapshot Lifecycle Management (SLM) feature to automate the generation and retention of snapshots, making sure regular snapshots of your data are taken, without users having to worry about manually creating or deleting them.
SLM allows users to configure:
- When to take the snapshots
- What to include in the snapshots
- When to delete old snapshots
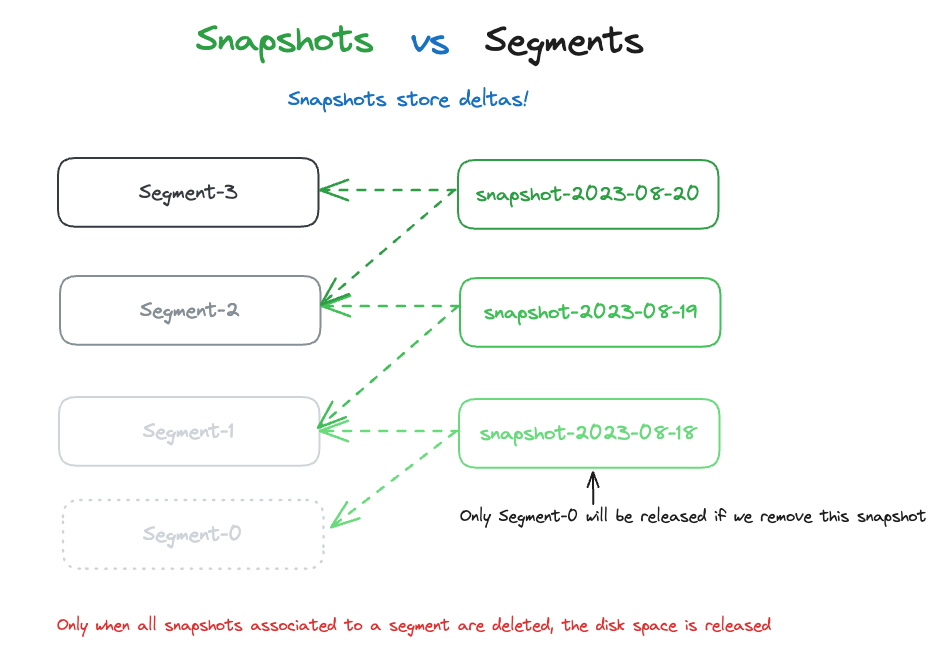
Something important to keep in mind is that snapshots store deltas. Many people think Elastic Cloud policy by default takes snapshots every 30 minutes, fully backing up the entire generated cluster, however, this is not accurate.
What happens is that every 30 minutes, the segment deltas between the current snapshot and the previous snapshot are stored. The immutable nature of the Lucene Segments allows users to track deltas because the previous segments didn’t change.
Consequently, to release disk space used by snapshots, users must remove all snapshots related to the given segments.
How to Use Snapshot Lifecycle Management?
You can configure SLM using Kibana, or by using APIs. Let’s explore both alternatives.
The snapshot portion of the configuration (what to backup) works just like a normal snapshot. You can find more information about how to configure Snapshots here.
Permissions
The account used to generated SLM policies via Kibana must have the following permissions:
- Cluster privileges: monitor, manage_slm, cluster:admin/snapshot, and cluster:admin/repository
- Index privilege: all on the monitor index
If users want to use the feature via API only, the following permissions are required:
- Cluster privileges: manage_slm, read_slm, and cluster:admin/snapshot/*
- Index privilege: all on .slm-history-* index
Users must also register a repository.
Good to Know
- Snapshots are automatically de-duplicated. So, frequent snapshots have little impact on storage overhead.
- Users can delete a snapshot without affecting the others (thanks to the segment’s dependency).
- Taking a snapshot will not block writing operations, but will not include them either.
- Multiple snapshots can be taken at the same time, configure how many via the snapshot.max_concurrent_operations cluster setting.
- A snapshot can include data streams and/or backing indices.
Creating an SLM Policy
Here’s how to create a Snapshot Lifecycle Management (SLM) policy in Elasticsearch:
The details of each step are presented below:
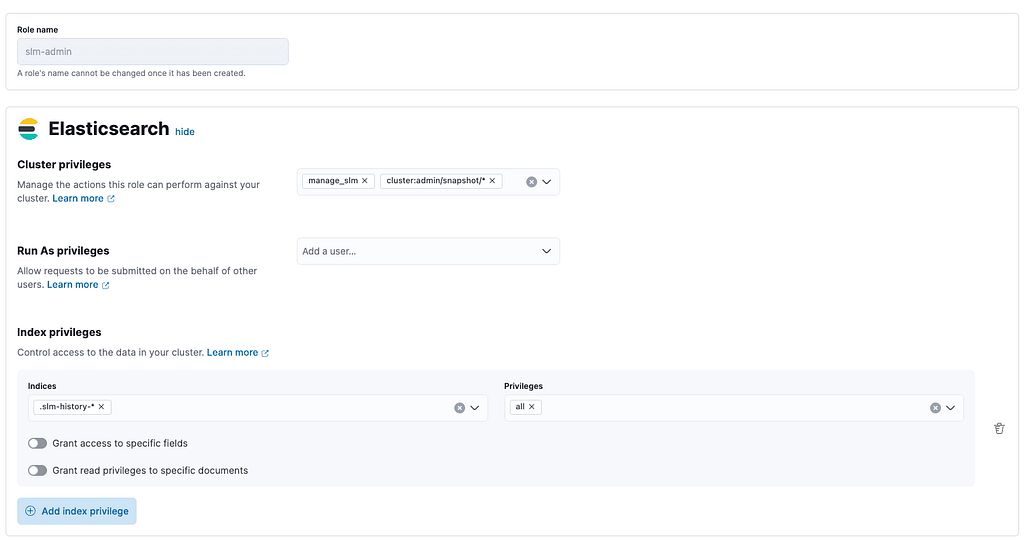
1. Create SLM user and role
Create the role first:
POST _security/role/slm-admin
{
  "cluster": [ "manage_slm", "cluster:admin/snapshot/*" ],
  "indices": [
    {
      "names": [ ".slm-history-*" ],
      "privileges": [ "all" ]
    }
  ]
}
Kibana:
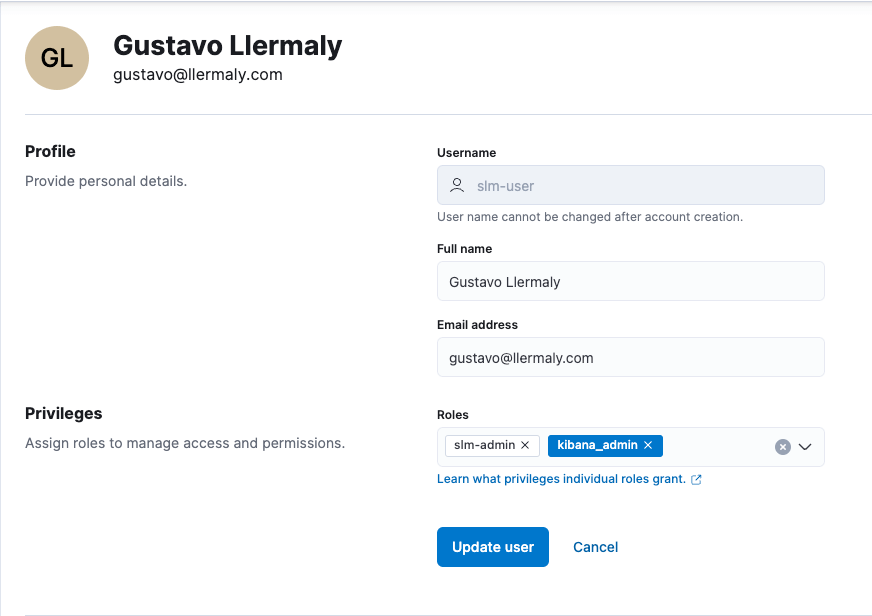
Now add the role to a user:
POST /_security/user/slm-user
{
  "password" : "some-password",
  "roles" : [ "slm-admin", "kibana_admin" ],
  "full_name" : "Gustavo Llermaly",
  "email" : "gustavo@llermaly.com"
}
Note: If you want to manage SLM using Kibana, you must add the kibana_admin role as well.
Kibana:
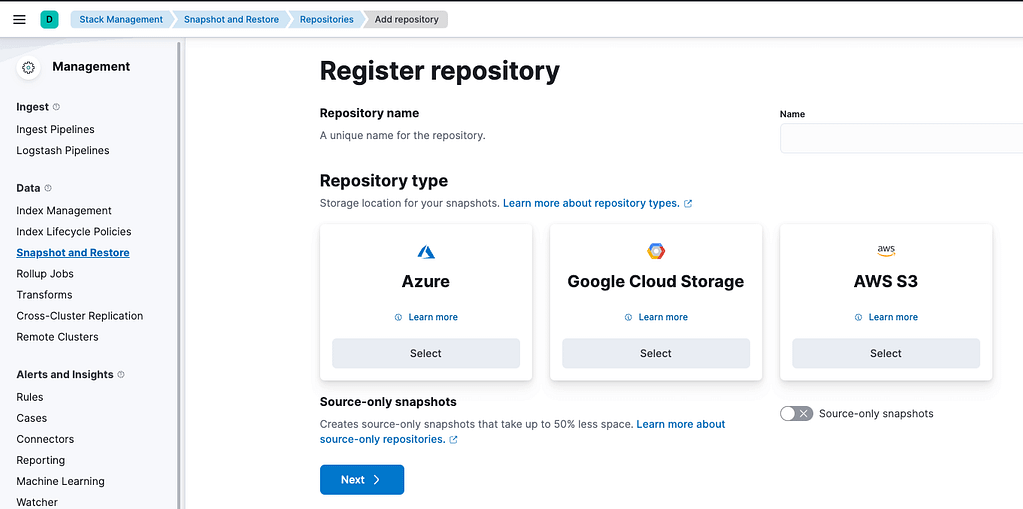
2. Register repository
Users can store backups on an object storage like S3, GCP Storage, Azure Blob Storage, or they can use the local file system.
By default, Elastic Cloud creates a found-snapshots repository, and using the following request users can create a custom S3 repository.
Read more about the custom repository process here:
PUT _snapshot/my_s3_repository
{
  "type": "s3",
  "settings": {
    "bucket": "my-bucket"
  }
}
Users can also find more information about snapshot repositories in our article, or in the official docs.
Kibana:
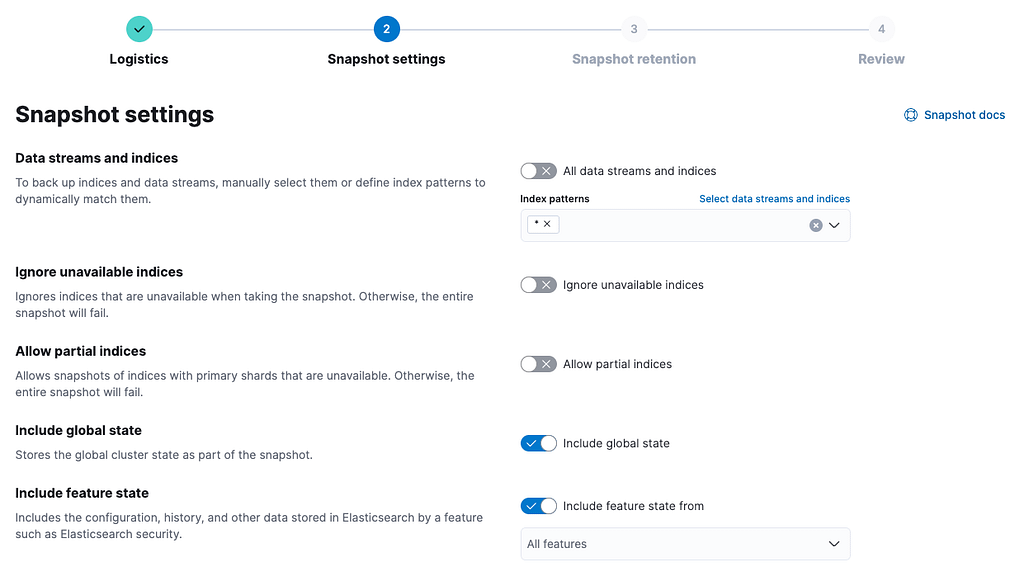
3. Configure SLM policy
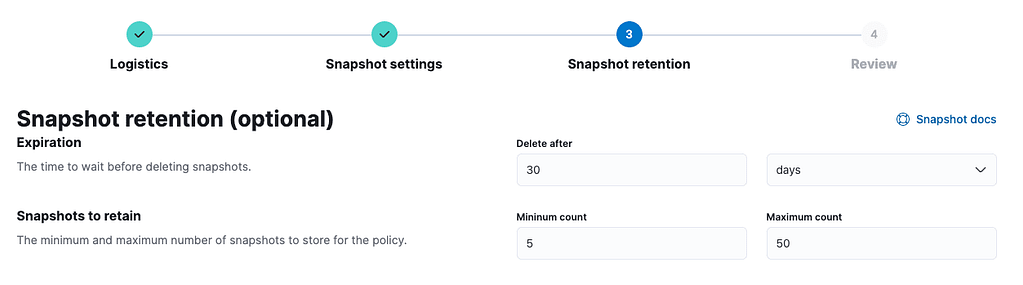
In this example, we will configure a policy that creates a new snapshot every day at 09:05 AM for the entire cluster state and features, removing snapshots more than 30 days old.
It will also retain no more than 50 snapshots, and no less than 5 snapshots.
PUT _slm/policy/daily-snapshots
{
  "schedule": "0 5 9 * * ?",
  "name": "<daily-snap-{now/d}>",
  "repository": "my_repository",
  "config": {
    "indices": "*",
    "include_global_state": true
  },
  "retention": {
    "expire_after": "30d",
    "min_count": 5,
    "max_count": 50
  }
}
Kibana:

Snapshot names must be unique, so we use a date math expression to change names to match the current date and time these were taken.
Users can read more about the CRON syntax to generate the schedule here:
Watcher schedule trigger | Elasticsearch Guide [8.9] | Elastic
After configuration, the policy will start running. For test purposes users can also manually trigger a policy.
4. Run SLM policy manually (optional)
Following the previous example with the daily-snapshots policy, if users want to run it manually, they must do so using the following command
POST _slm/policy/daily-snapshots/_execute
Kibana:

Conclusion
Snapshot Lifecycle Management (SLM) is an indispensable tool for Elasticsearch users who want to consistently back up their data. With SLM, users can automate the process of snapshot generation and retention, ensuring that backups are both timely and efficient. Most importantly, by storing deltas instead of complete cluster backups, SLM is resource-efficient. Leveraging the immutable nature of Lucene segments, SLM guarantees that only changes from the last snapshot are recorded and that no duplicate snapshots are stored.
To fully harness the potential of SLM, users need to acquaint themselves with its configuration process, whether it’s through Kibana or API calls. This includes understanding permissions, setting up repositories, and creating policies tailored to specific needs. Moreover, the flexibility of SLM allows for both scheduled and manual executions of snapshot policies.
If data reliability and efficient storage utilization are top priorities, then integrating SLM into your Elasticsearch setup is not just a nice-to-have, but a necessity. By doing so, you can safeguard your data against unforeseen losses, while optimizing your system’s performance and storage capabilities.