Quick Links
Background
It is not possible to increase the primary shard number of an existing index, meaning an index must be recreated if you want to increase the primary shard count. There are 2 methods that are generally used in these situations: the _reindex API and the _split API.
The _split API is often a faster method than the _reindex API. Indexing must be stopped before both operations, otherwise the source_index and target_index document counts will differ.
Also, do not forget that you can easily perform all these operations with the help of the AutoOps Operator.

Method 1 – using the split API
The split API is used to create a new index with the desired number of primary shards by copying the settings and mapping an existing index. The desired number of primary shards can be set during creation. The following settings should be checked before implementing the split API:
- The source index must be read-only. This means that the indexing process needs to be stopped.
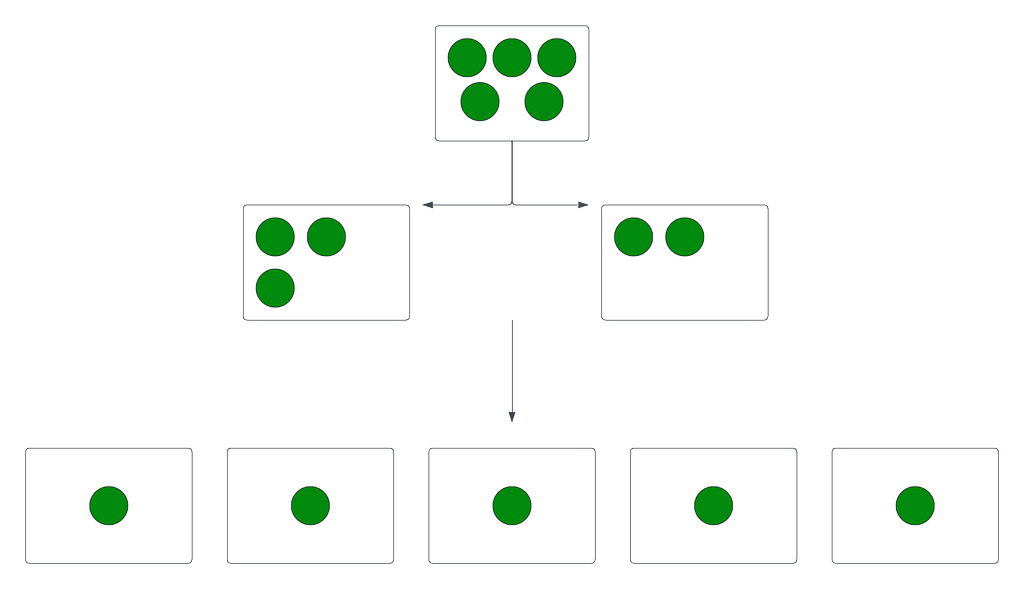
- The number of primary shards in the target index must be a multiple of the number of primary shards in the source index. For example, if the source index has 5 primary shards, the target index primary shards can be set to 10,15,20, and so on.
Note: If only the primary shard number needs to be changed, the split API is preferred as it is much faster than the Reindex API.
Implementing the split API
Create a test index:
POST test_split_source/_doc
{
  "test": "test"
}
The source index must be read-only in order to be split:
PUT test_split_source/_settings
{
  "index.blocks.write": true
}
Settings and mappings will be copied automatically from the source index:
POST /test_split_source/_split/test_split_target
{
  "settings": {
    "index.number_of_shards": 3
  }
}
You can check the progress with:
GET _cat/recovery/test_split_target?v&h=index,shard,time,stage,files_percent,files_total
Since settings and mappings are copied from the source indices, the target index is read-only. Let’s enable the write operation for the target index:
PUT test_split_target/_settings
{
    "index.blocks.write": null
}
Check the source and target index docs.count before deleting the original index:
GET _cat/indices/test_split*?v&h=index,pri,rep,docs.count
Index name and alias name can’t be the same. You need to delete the source index and add the source index name as an alias to the target index:
DELETE test_split_source
PUT /test_split_target/_alias/test_split_source
After adding the test_split_source alias to the test_split_target index, you should test it with:
GET test_split_source
POST test_split_source/_doc
{
  "test": "test"
}
Method 2 – using the reindex API
By creating a new index with the Reindex API, any number of primary shard counts can be given. After creating a new index with the intended number of primary shards, all data in the source index can be re-indexed to this new index.
In addition to the split API features, the data can be manipulated using the ingest_pipeline in the reindex AP. With the ingest pipeline, only the specified fields that fit the filter will be indexed into the target index using the query. The data content can be changed using a painless script, and multiple indices can be merged into a single index.
Implementing the reindex API
Create a test reindex:
POST test_reindex_source/_doc
{
    "test": "test"
}
Copy the settings and mappings from the source index:
GET test_reindex_source
Create a target index with settings, mappings, and the desired shard count:
PUT test_reindex_target
{
  "mappings" : {},
  "settings": {
    "number_of_shards": 10,
    "number_of_replicas": 0,
    "refresh_interval": -1
  }
}
*Note: setting number_of_replicas: 0 and refresh_interval: -1 will increase reindexing speed.
Start the reindex process. Setting requests_per_second=-1 and slices=auto will tune the reindex speed.
POST _reindex?requests_per_second=-1&slices=auto&wait_for_completion=false
{
  "source": {
    "index": "test_reindex_source"
  },
  "dest": {
    "index": "test_reindex_target"
  }
}
You will see the task_id when you run the reindex API. Copy that and check with _tasks API:
GET _tasks/<task_id>
Update the settings after reindexing has finished:
PUT test_reindex_target/_settings
{
  "number_of_replicas": 1,
  "refresh_interval": "1s"
}
Check the source and target index docs.count before deleting the original index, it should be the same:
GET _cat/indices/test_reindex_*?v&h=index,pri,rep,docs.count
The index name and alias name can’t be the same. Delete the source index and add the source index name as an alias to the target index:
DELETE test_reindex_source
PUT /test_reindex_target/_alias/test_reindex_source
After adding the test_split_source alias to the test_split_target index, test it using:
GET test_reindex_source
Summary
If you want to increase the primary shard count of an existing index, you need to recreate the settings and mappings to a new index. There are 2 primary methods for doing so: the reindex API and the split API. Active indexing must be stopped before using either method.
To perform these operations automatically, you can use the AutoOps Operator.

